The PDF ticket you receive after registering for an event is intended to be printed on A4 paper and folded into four pages, so you can customize which side you want to put what content on.
For example, a list of selected sessions can be displayed in the upper right-hand corner, and event notes can be displayed in the lower right-hand corner.
You can also customize the content of each ticket type, so you can change the notes and header design to match the content of the ticket.
This is a paid function, so you will need to pay a separate fee to use it.
To edit a ticket design, log in to your Premium account, go to "My Events", select the appropriate event, and then click
From the side menu of the event management screen, click "Ticket & Price Settings" > "Edit Ticket Design".
Contents)
- Pre-set Ticket Designs and Custom Ticket Design
- Example of Ticket Design
- Ticket Design - Upper left section
- Ticket Design - Upper right section
- Ticket Design - Lower left section and Lower right section
1.Pre-set Ticket Designs and Custom Ticket Design
■Pre-set Ticket Designs
Set up a "Pre-set ticket design" first.Pre-set Ticket Designs is the design that will be applied if you don't specify a specific ticket.。
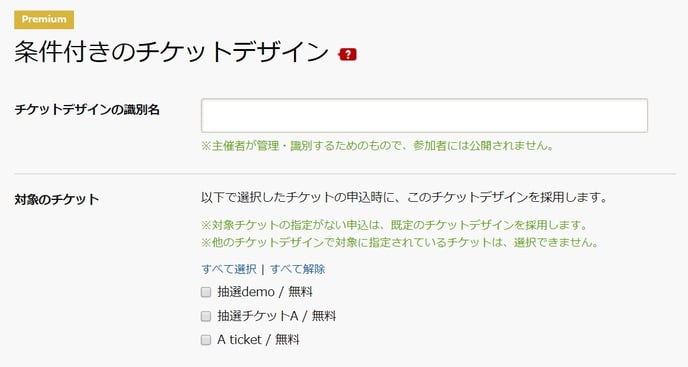
■Custom Ticket Design
After creating the Pre-set Ticket Designs, you can add the "Custom Ticket Design".
In Custom Ticket Design, you can specify which tickets you want the design to be applied to.
Use the Custom Ticket Design if you want a different design for a specific ticket.
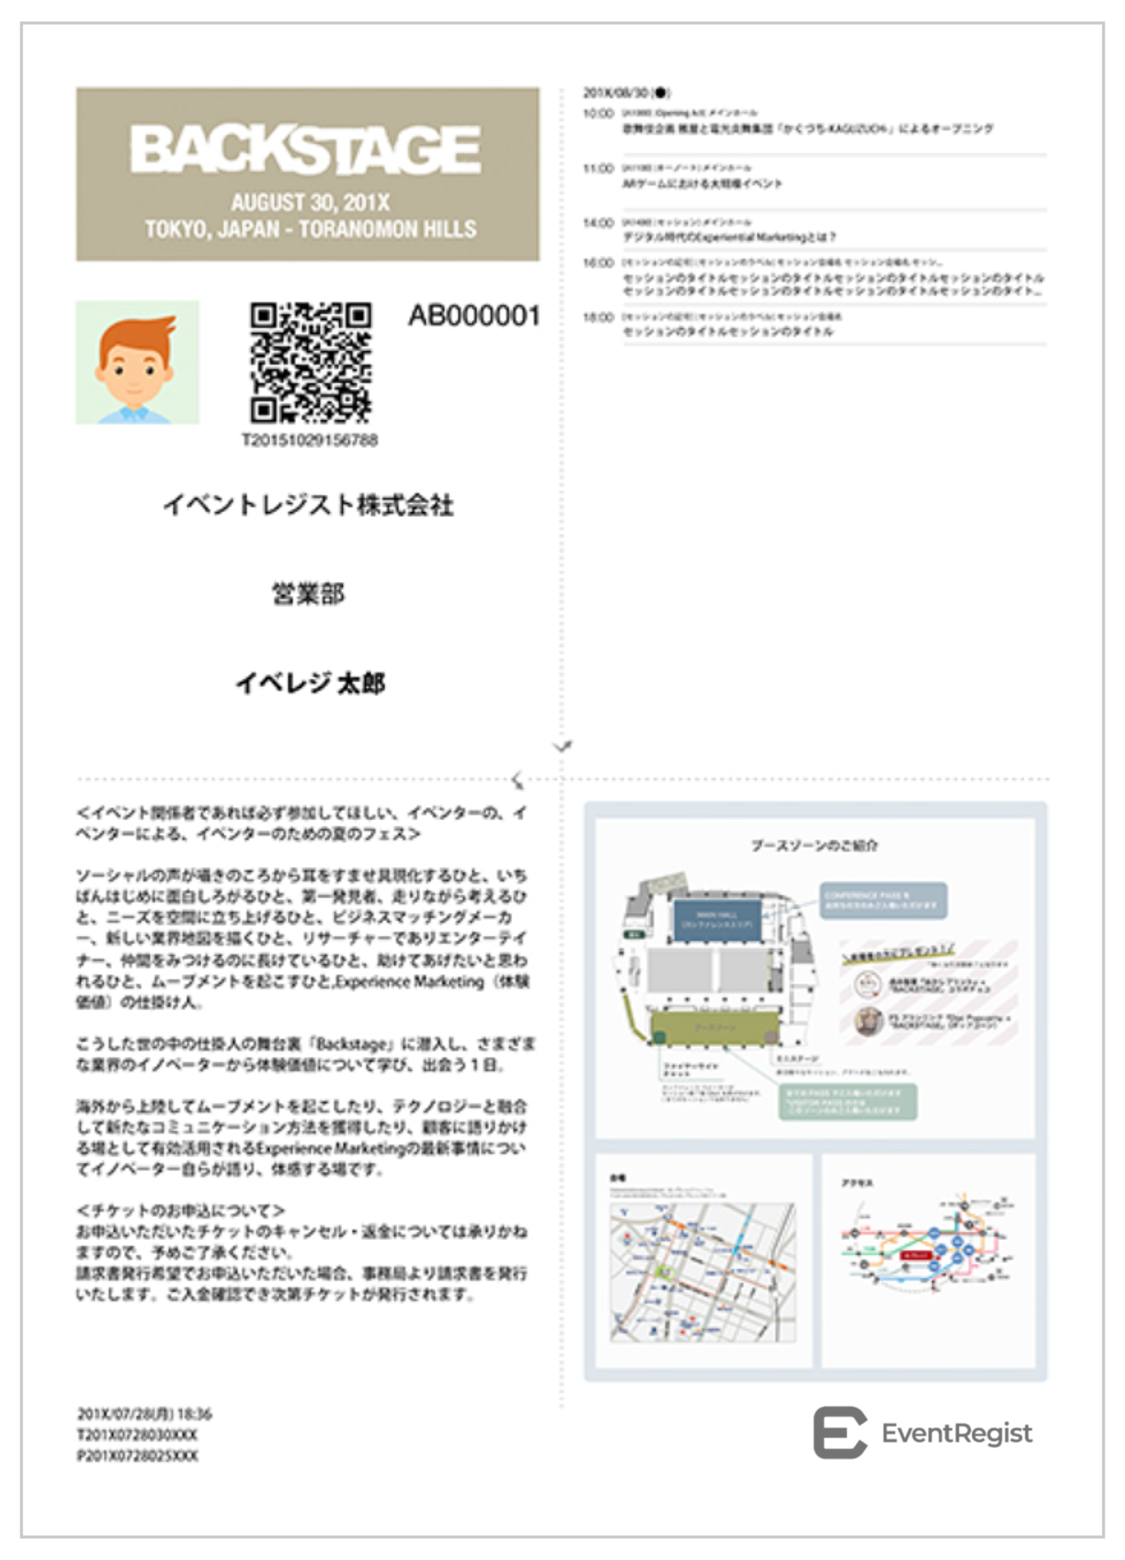
2.Example of Ticket Design
Tickets are supposed to be folded into four sides after printing on A4 paper.
Set up the display items for each of the four sides of the ticket (Upper Left, Upper Right, Lower Left and Lower Right).
First, let's set the Upper left section of the ticket.
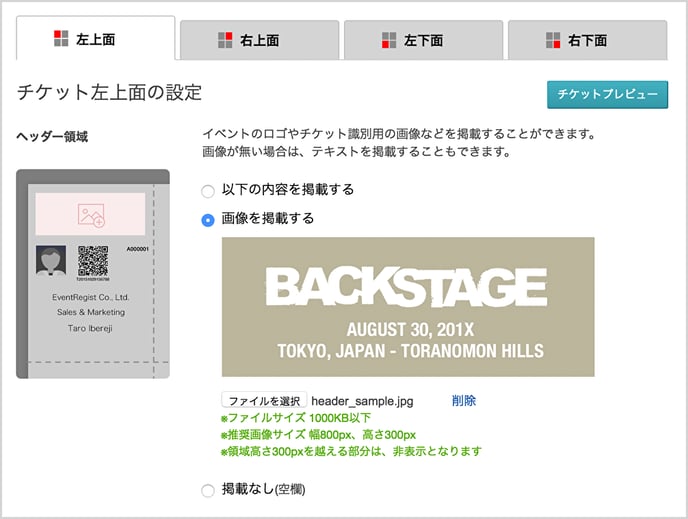
3.Ticket Design - Upper left section
In the Upper left section of the ticket, set a header image such as the event logo in the header area, and post a QR code and attendee information such as name underneath it.
■Header background
You can add the event logo or another image to distinguish the ticket.
If you don't have an image, you can use text instead.
- Publish the contents below:
The text you type in the text area will appear in the header area.
- {{event_name}}{% raw %} refers to the registered event name, while {% raw %} {{ticket_name}}{% raw %} refers to the relevant ticket name.
- Content that exceeds the maximum height of 300px will not be displayed.
- Publish image:
The uploaded image will appear in the header area. Please note the following size.- A file size of 1000KB or less
- Recommended image size is 800px wide x 300px high
- The area of the image that exceeds the maximum height of 300px will not be displayed
- Don't publish (blank space)
■Attendee Information
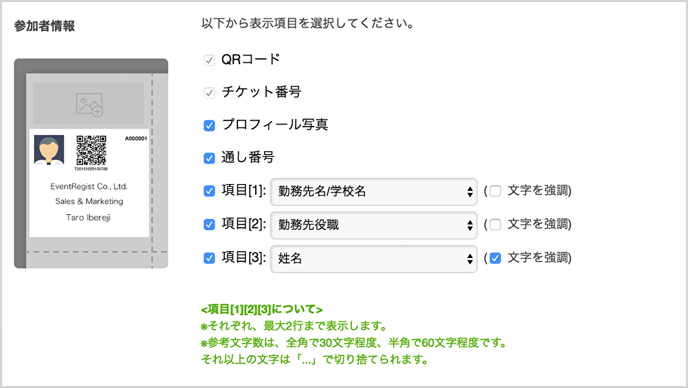
- QR code/Ticket No.:
This item must be displayed. It cannot be hidden. - Profile picture:
If you choose to include a "profile picture" as mandatory or optional in Collect Custom Information, you can choose whether or not to include it in the ticket. - Sequential serial number
"Detailed Ticket Settings" and if "Display serial number" is checked, select whether or not you want it to appear on the ticket. - Item[1]〜[3]:
You can select up to 3 options from various fields such as Full Name, Company Name/School, Job Title/Business Title, etc., in addition to the ticket name and event name.
-
When you check the [Bold text] box, the text is displayed in bold type.
-
Each can display a maximum of 2 lines.
-
Each can accept up to about 60 characters (30 multi-byte characters)
-
Characters over this limit will be truncated with "..." .
-
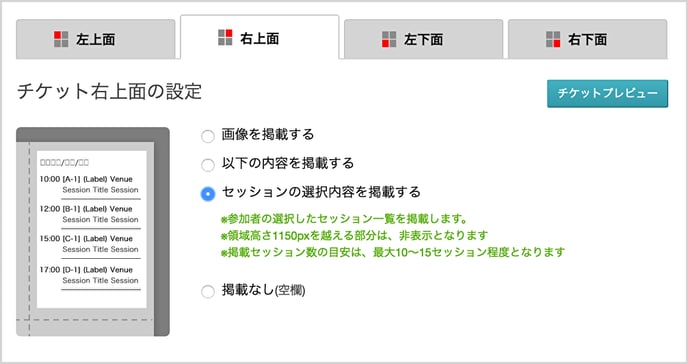
4.Ticket Design - Upper right section
In the Upper right section of the ticket, you can choose from the following listings.
- Publish image:
The uploaded image will appear on the Upper right section.Please note the following sizes.- A file size of 1000KB or less
- Recommended image size is 800px wide x 1150px high
- The area of the image that exceeds the maximum height of 1150px will not be displayed
- Publish the contents below:
Type in the text area.
- Content that exceeds the maximum height of 1150px will not be displayed.
- Publish selected sessions:
A list of sessions selected by the attendee will be published.- Anything that exceeds the maximum height of 1150px will not be displayed.
- The approximate number of sessions that will be published will be a maximum of 10 to 15.
- Publish event ticket information
The information below will be published.
- Event information (event name, organizer name, event dates, venue)
- Ticket information (ticket name, price, ticket description)
- Don't publish (blank space)
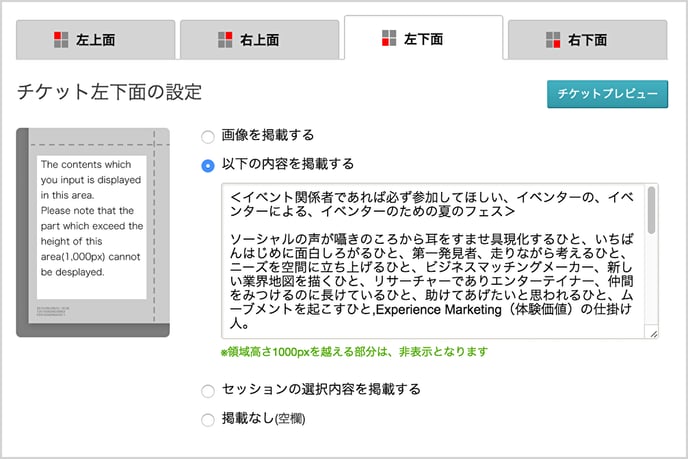
5.Ticket Design - Lower left section and Lower right section
Set up the contents of the Lower left section and Lower right section listings in the same way as the Upper right section of the ticket.
- Publish image:
The uploaded image will appear on the Lower left section or Lower right section.Please note the following sizes.- A file size of 1000KB or less
- Recommended image size is 800px wide x 1150px high
- The area of the image that exceeds the maximum height of 1000px will not be displayed
- Publish the contents below:
Type in the text area.- Content that exceeds the maximum height of 1000px will not be displayed.
- Publish selected sessions:
A list of sessions selected by the attendee will be published.- Anything that exceeds the maximum height of 1150px will not be displayed.
- The approximate number of sessions that will be published will be a maximum of 10 to 15.
- Publish event ticket information
The information below will be published.- Event information (event name, organizer name, event dates, venue)
- Ticket information (ticket name, price, ticket description)
- Don't publish (blank space)
If the above does not solve your problem, please contact us via the inquiry form.
(Our business hours are from 10:00am to 6:00pm Japan time on weekdays. For inquiries made on weekends and holidays, our response may be on the next business day.)