This is a paid function, so you will need to pay a separate fee to use it.
Contents)
- What is changing the location of the ticket registration form?
- How to create an embedded widget
- Embed the embedded widget into the event page
- Editing CSS
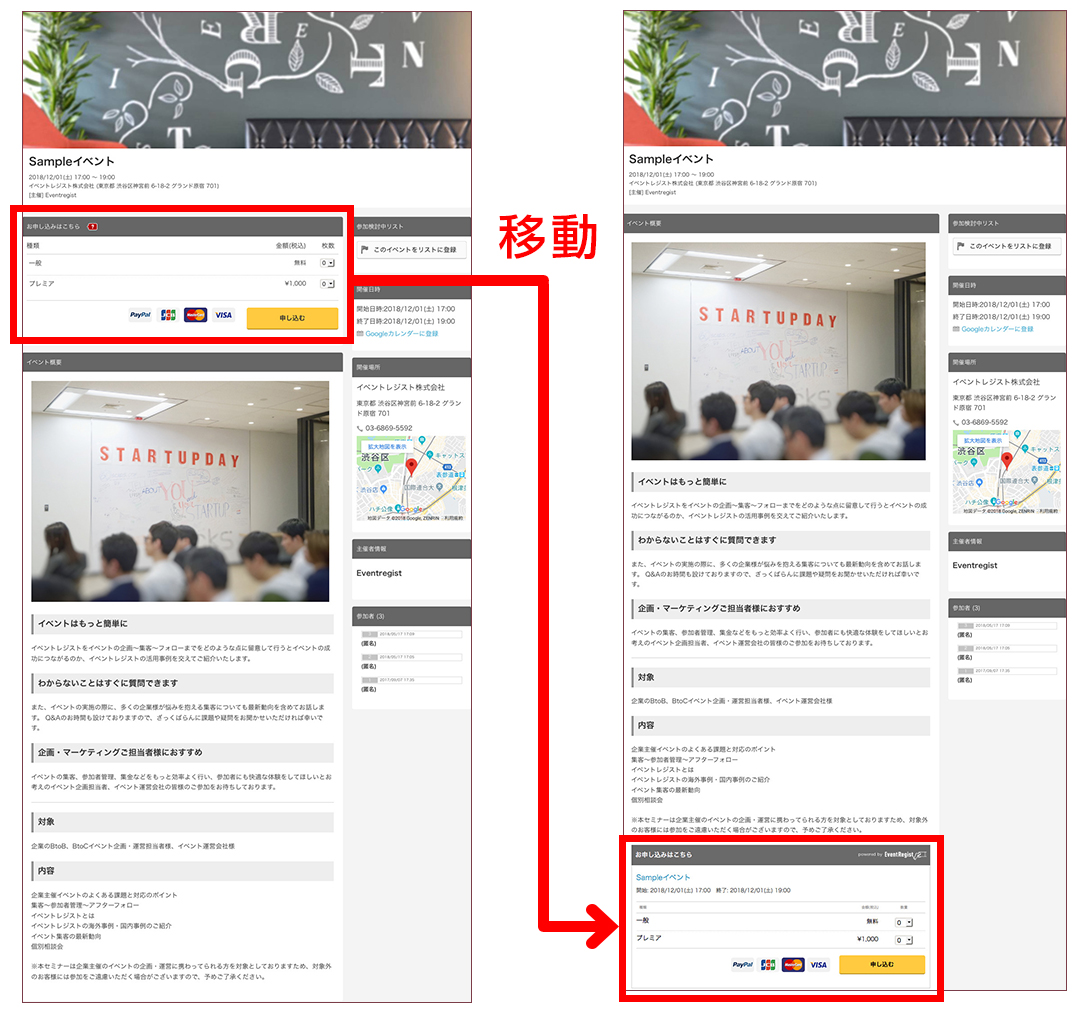
1.What is changing the location of the ticket registration form?
The ticket registration form on the event page is located above the Event Description field by default.
If you want to display the Event Description field at the top, you can move the ticket registration form from the default position (top of the Event Description field) to the bottom of the Event Description field.
2.How to create an embedded widget
Since the default ticket registration form cannot be moved as is, it can be moved by creating an embedded form and embedding the code in the desired location.
To create an embedded form, after logging in with your Premium account, go to "My Events" and select the appropriate event, then click
From the Event Management top side menu, click "Promotion" > "Registration form (embedded widget)".
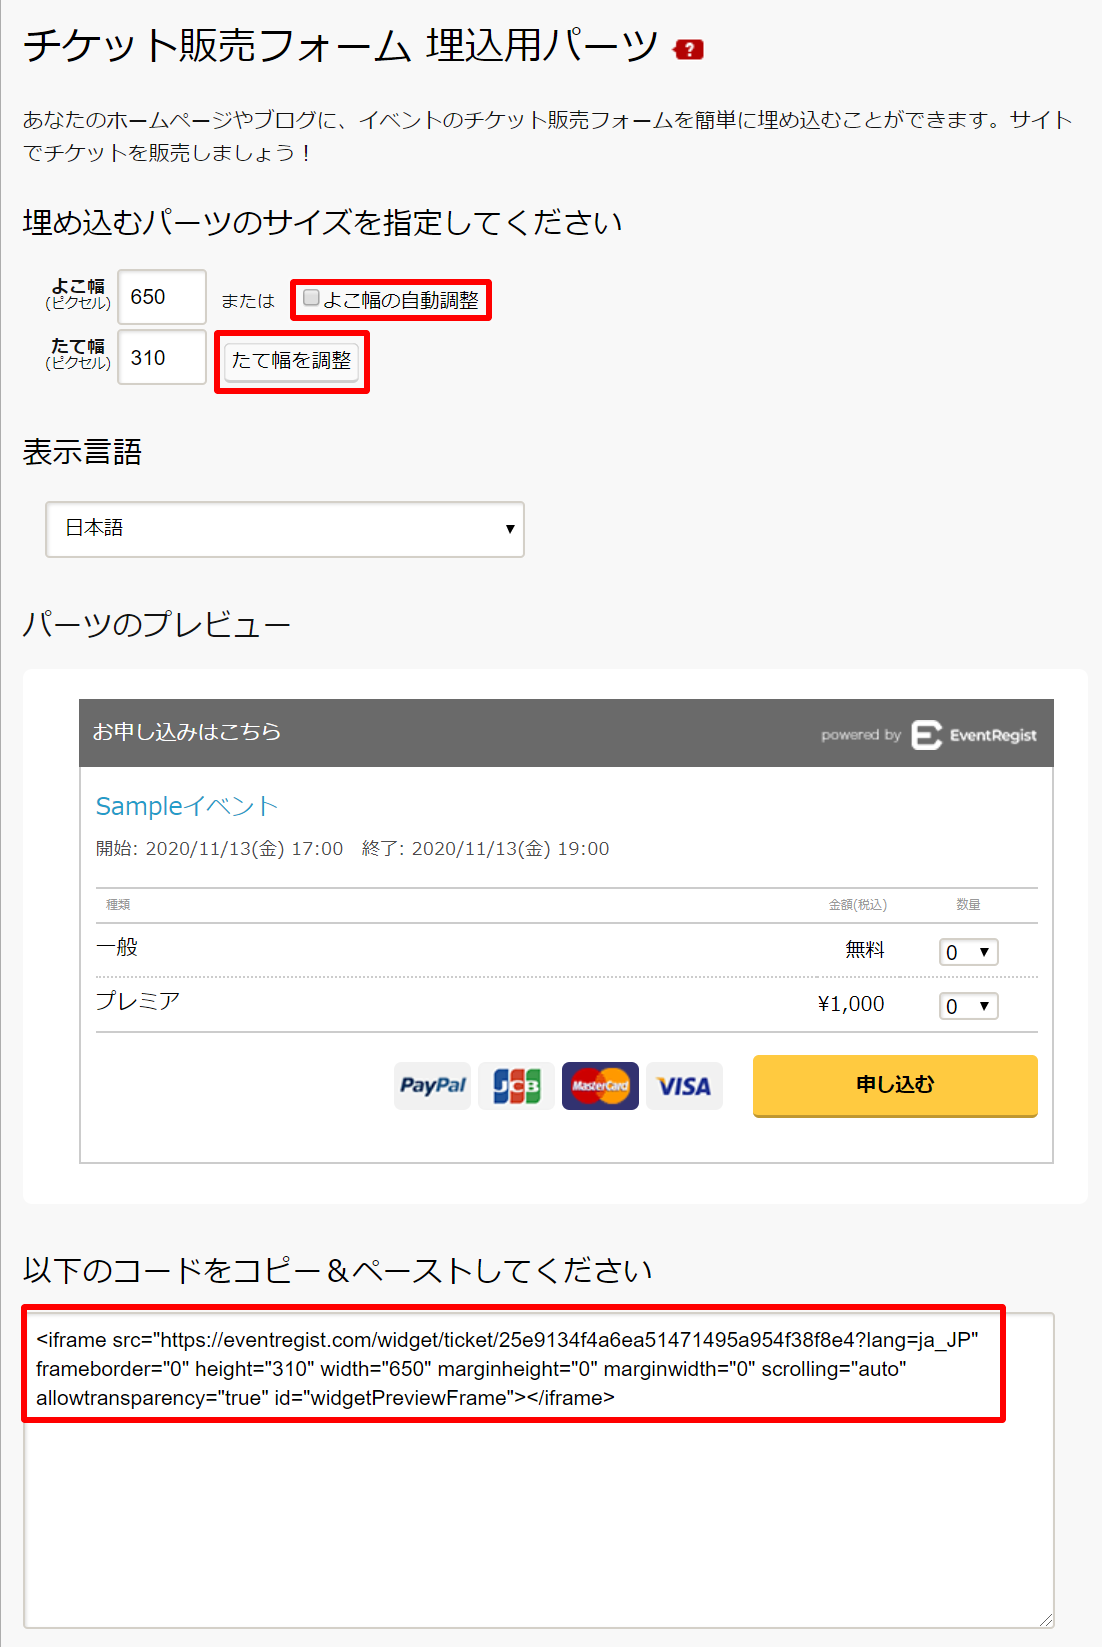
The "Add Ticket Purchase Form to Website" screen is displayed.
First, check the height of the widget, which will be required in the "4.Editing CSS" settings later.
If you check "adjust automatically" for width first and then click "adjust automatically" for height, the height of the widget will be displayed in the height column, so make a note of it.
After that, copy the source code (everything starting with <iframe ~ ~) displayed in "Copy & Paste the following code" at the bottom.
3.Embed the embedded widget into the event page
Paste the source code copied in the previous section into the "Summary" field on the event page.
Click "Manage Event Information" > "Edit event information" from the side menu.
Click the "Source code" button on the right side of the HTML editor in the "Summary" field in the middle of the screen.
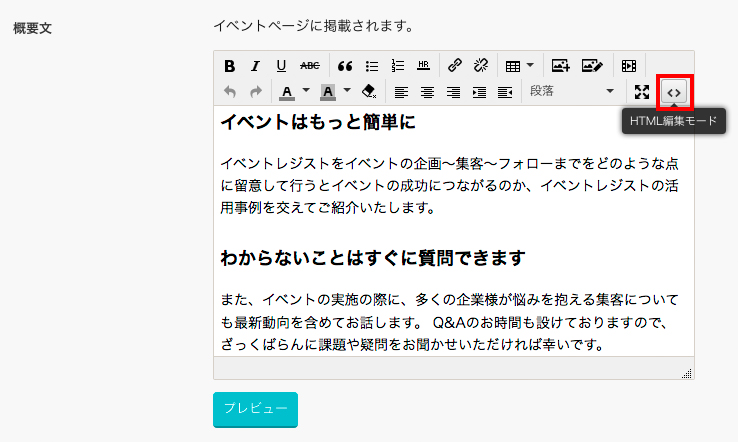
When the Souce code edit screen opens, scroll to the bottom of the souce code already displayed, paste the source code of the embedded form that you copied in the previous section, and click "OK".
Click "Save" at the bottom of the screen to save it.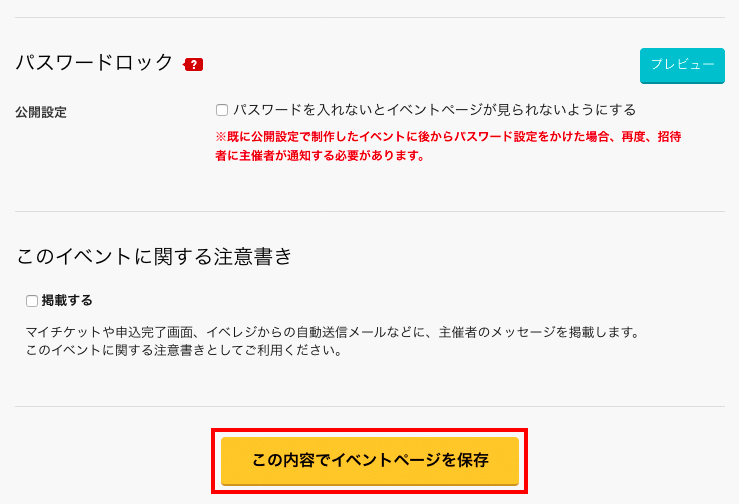
4.Editing CSS
Hide the default ticket registration form and adjust the size of the Embedded Form that was embedded in the previous section.
To edit the CSS of your event page, from the side menu, click "Manage Event Information" > "Edit Event Page Design".
At the bottom of the screen, under "Original Style Sheet (for advanced users)", click "Set up".
Enter the following source code into the input form on the black screen, as shown in the red frame of the figure below.
|
/** Hide the default registration form**/ /** Adjust the size of the embedded widget**/ |
[Note]
If there are many types of tickets, the height of the embedded form may not fit and the application button etc. may be cut off. In that case, adjust the height.
Height: 320px! Important;
If you set the above "320" to the height of the widget obtained by "2. How to create an embedded widget", it will be displayed without being cut off.
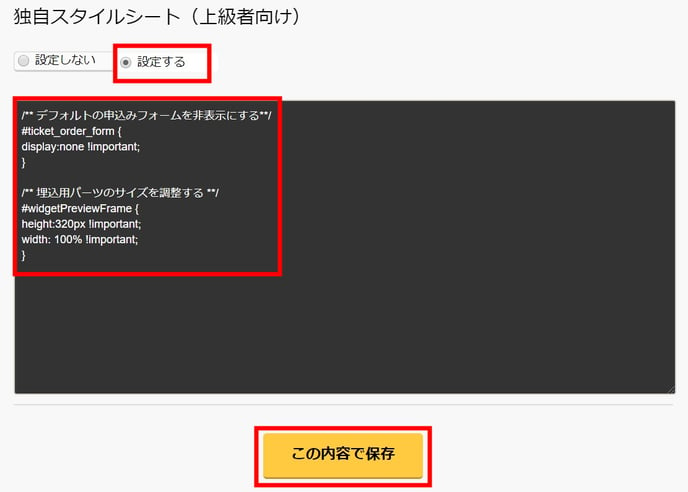
Finally, click "Save" at the bottom of the screen to save your edits.
When you have finished editing everything, open the event page to check that it is displayed correctly.
If the above does not solve your problem, please contact us via the inquiry form.
(Our business hours are from 10:00am to 6:00pm Japan time on weekdays. For inquiries made on weekends and holidays, our response may be on the next business day.)