Ticket applicants should refer to the following page.
▶ Learn more: Downloading Receipt
For events that sell paid tickets in the transaction currency "Japanese Yen," the organizer chooses whether to issue receipt data. This can be done when creating a new event, or it can be changed after the event is created.
If the organizer chooses to issue receipt data, the applicants will be able to retrieve the receipt data from their own [My Tickets] page.
■When creating an event
Click [Create New Event] to display the event creation screen. After entering the ticket amount field, the items necessary for selling paid tickets will appear at the bottom of the page.
Select [Allow the issue of a receipt] in the "Event Organizer's information for receipt data" field.
■Editing after creating an event
Select the target event from [My Events].From the side menu of the event management screen, open [Receipt Data Settings] and select [Allow the issue of a receipt].
The default setting is [Do not allow the issue of a receipt].When [Allow the issue of a receipt] is selected, the organizer information entry field will appear. Enter the information to be included in the receipt data, such as the name and address of the organizer.
The field for "Period of the event" allows you to set any desired duration. As some events choose to hide the event duration on the event page, the setting for receipt data will require manual input.
[Note]
If you are a qualified invoice issuer, enter the [Registration number of qualified invoice issuer] and check the [Display tax] box.If you do not display the tax, the receipt will not meet the eligibility requirements.

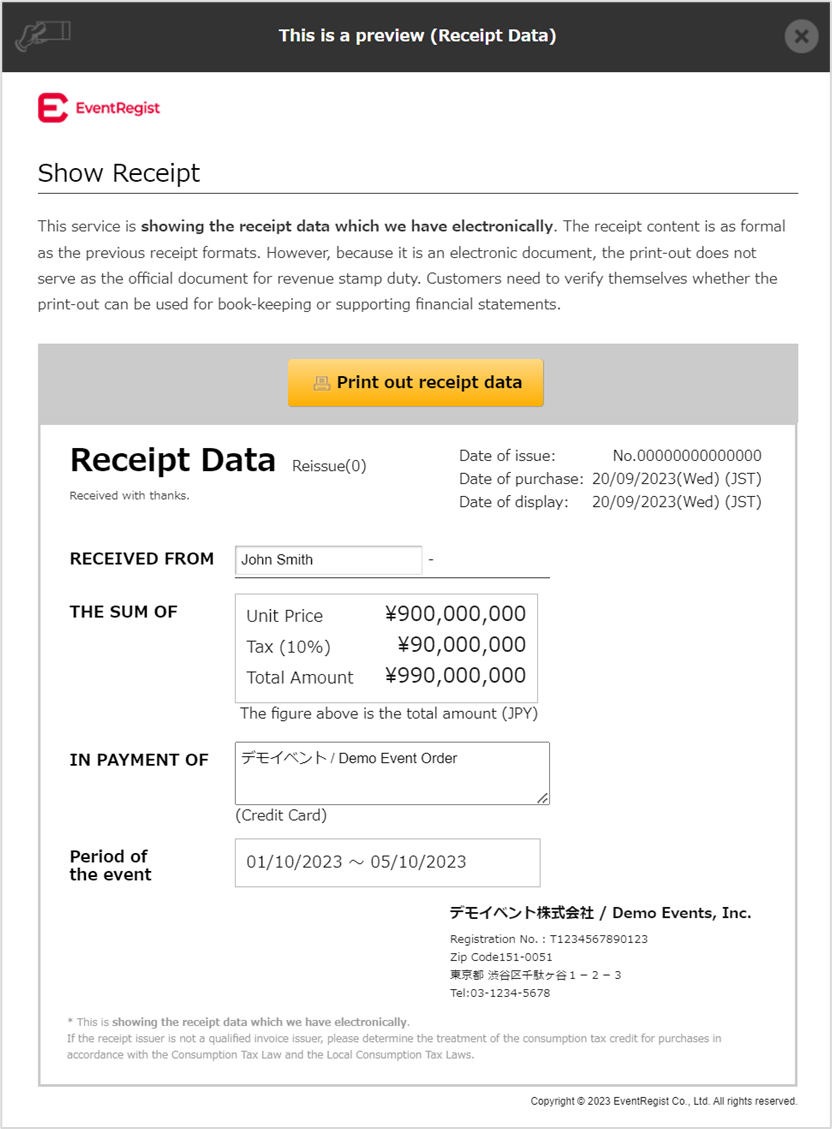
Click on the [Receipt data preview] button to see how the data will be displayed to the applicants. Demo data will be displayed in the areas that have not yet been finalized.
After entering all setting items, click [Save].