After you create an event, you can enhance your event page by editing the event information.
[Note]
If you've sold at least one ticket, when you edit the event and save your changes, an email informing already registered attendees will be sent automatically. This is a feature for the benefit of attendees who have previously registered. so this notification cannot be turned off. Please be aware of this when editing your event.
If you are using the Premium function, you can choose not to receive email notifications.
▶ Learn more: [Premium] Automated E-mail Settings
To edit your event information,from the listing of your event on the [My Events] page, click [Edit/Manage] next to the event you want to edit and then click on [Edit event information] from the left side navigation menu.
Click the [Preview] button to see what is being edited.When you have finished entering the items to be edited, click [Save] at the bottom of the page to save it.
The "Edit Event Information" page is one long, single page, and is divided into sections.
Contents)
- Basic Info and Event Starts
- Location
- Event Summary
- Event Page Settings (Advanced)
- Password Protected
1. Basic Info and Event Starts
From the left side navigation menu of the event management screen, click [Edit event information], and set the event name and date.
(Please read these notes before saving your changes.)

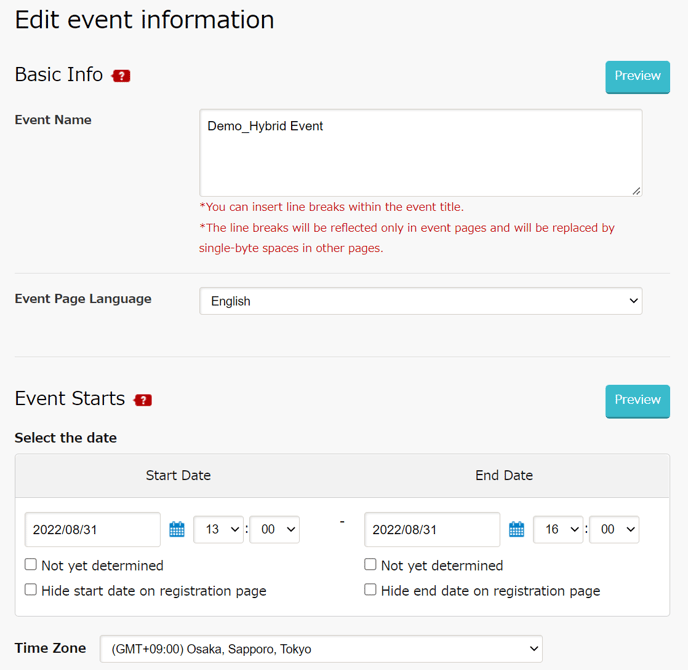
[Basic Info]
- Event Name
You can change the event name even after the event is created and published.
*The character limit is 150 characters.There is no limit to the number of line breaks.
*You can insert line breaks within the event title.
*The line breaks will be reflected only in event pages and will be replaced by single-byte spaces in other pages. - Event Page Language : The language used to display the event page
[Event Starts]
- Select the date :
You can change the start and end dates and times.
If the time is undecided, or if you do not want to publish the date and time, check the [Not yet determined] or [Hide start/end date on registration page] box under the date and time.
Alternatively, if you have decided on a start/end time that was undecided when you created the event, enter the time and uncheck [Not yet determined] to reflect it on the event page. - Time Zone :
Select the time zone in which your event will be held (In the case of Japan, select (GMT+09:00) Osaka, Tokyo, Sapporo).
2. Location
From the left side navigation menu of the event management screen, click [Edit event information], and set the event name and date.
(Please read these notes before saving your changes.)
The [Event Types] setting was added in December 2021.
Events created prior to the addition of this feature will display the message "Event Types : Required." when you open [Edit event information] on the administration screen.
Please select one of the event types and save the event.
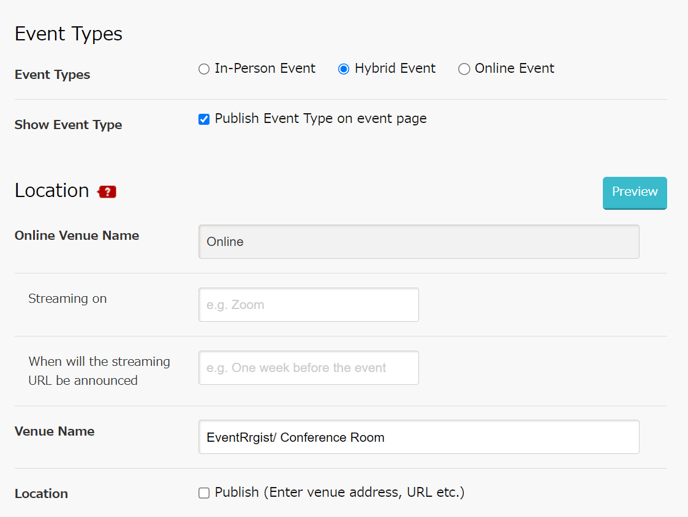
[Event Types]
- Event Types : Either In-Person Event/Hybrid Event/Online Event was selected when the event was created. Event Types is a required field and can be changed later.
- Show Event Type : If you check Publish Event Type on event page, the Event Types badge will appear at the top of the event page.
| Even if the event format is set to "Online", the PDF ticket used mainly for In-Person Event will be attached/displayed in the Order Confirmation e-mail and the applicant's My Ticket. By using the Premium function, you can set not to attach/display the PDF ticket. ▶ Learn more: [Premium] Ticket Distribution and Display Settings |
[Location]
Enter the Venue Name and the Streaming Method according to the selected Event Types.
Online Events : You can set the streaming method and when the streaming URL will be announced.
In-Person Even t: You can set the venue name, location, Google Map display, etc.
Hybrid Event : Both Online and In-Person Event settings will be displayed.
■Online Events
- Online venue name : "Online" is displayed by default and cannot be changed. It will not be posted on the event page.
- Streaming on : You can enter streaming tools such as "Zoom", "Youtube", etc.
- When will the streaming URL be announced : You can enter the notification timing. "One week before the event", "E-mail notification by 15:00 on the day before the event", etc.
■In-Person Event
- Venue name : The name of the venue where you will hold your event
- Location : If you want to enter the venue address, URL etc., place a check in this check box.Please enter the items to be posted on the event page. No need to enter if you do not want to post.
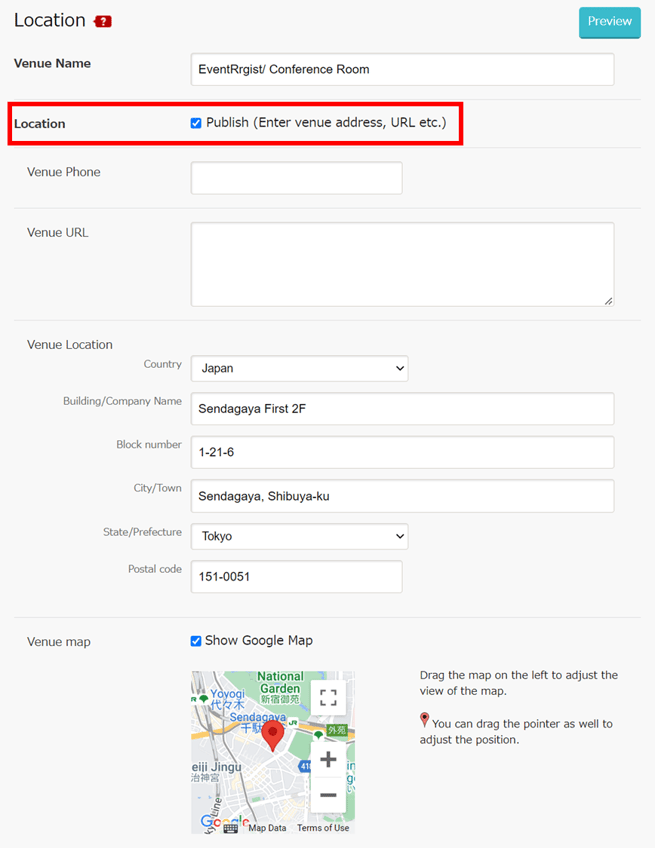
- Venue map : If you want to display a Google Map, place a check in the "Show Google Map" check box. Check that the map pointer is correct and adjust if needed.
3. Event Summary
From the left side navigation menu of the event management screen, click [Edit event information], and set the event logo and summary text.
(Please read these notes before saving your changes.)
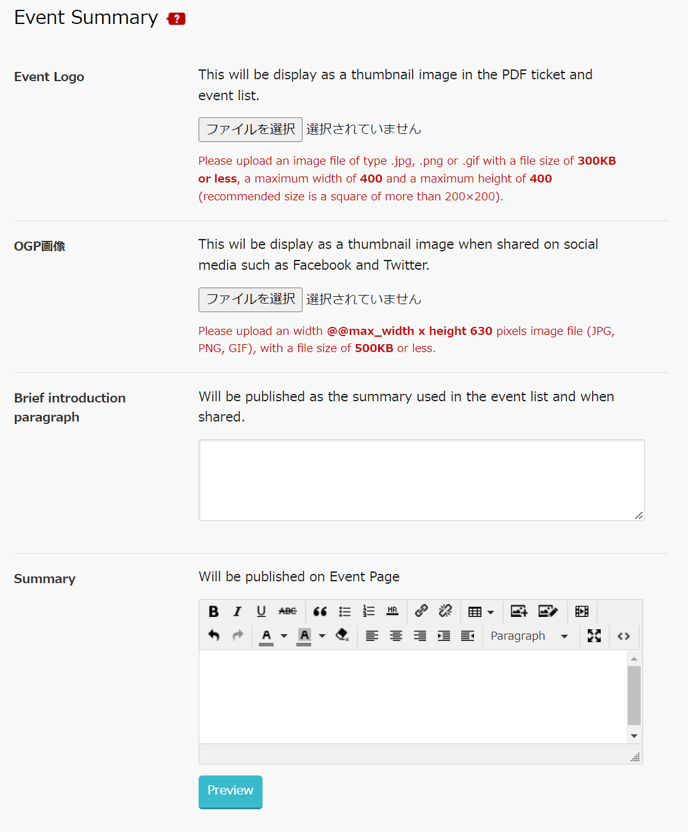
[Event Summary]
- Event logo :
You can set an image that published as a thumbnail for use on the PDF Ticket, the Event Listing and for Facebook sharing.
Please upload an image file (JPG, PNG, GIF) with a file size of 300 kb or less and a width of 400 x height of 400 or less (a square of 200 x 200 or more is recommended). - OGP Images :
This wil be display as a thumbnail image when shared on social media such as Facebook and Twitter.
Please upload an width 1200 x height 630 pixels image file (JPG, PNG, GIF), with a file size of 500KB or less. - Brief introduction paragraph :
You can set up a brief introduction (Open Graph Description) that is automatically displayed on Facebook and other social media when the event page URL is shared or posted to the Events List.
The Events List is a list of events when an organizer page is created.
▶ Learn more: Editing Organizer Page - Summary :
The event summary that is published on the event page. You can change the character size and color, add links to external sites and add images (images must be hosted outside EventRegist with the URL to the externally hosted image set as the source for the image).
4. Event Page Settings (Advanced)
From the left side navigation menu of the event management screen, click [Edit event information], and set up social buttons, Google Tag Manager, etc.
(Please read these notes before saving your changes.)

[Event Page Settings (for advanced users)]
- Social button :
For getting the word out about your event, you select the types of social media buttons that you want on your event page. However, it is not guaranteed to work on events where you set a password. If it's a closed event where you'd prefer people didn't share, remove the checks from the check boxes. - Show All Attendees :
Display a list of attendees on the right sidebar of the event page. The information displayed is at the discretion of the attendee. If nothing is entered, they are shown as "anonymous". If you don't want the attendee list to be displayed, remove the check. - Show Facebook Comments :
The Facebook comments plug-in can be added underneath the event summary. - Facebook Page Plug-in :
If the event has a Facebook page, you can enter the URL of the Facebook event page and a "Like Box" will be displayed on the event page. - Google Analytics :
If you want detailed information about those accessing the event page, you can add a new property using Google Analytics. Set Google Analytics tracking ID. - Google Tag Manager :
If you want to embed the GTM tag in your event page, specify the container ID.
5. Password Protected
You can setup "Password Protected" on the published event pages to restrict access to them. To learn how to setup, please click on the page below.
▶ Learn more: Password Protected for Event Page
If the above does not solve your problem, please contact us via the inquiry form.
(Our business hours are from 10:00am to 6:00pm Japan time on weekdays. For inquiries made on weekends and holidays, our response may be on the next business day.)